Easy Baked Pork Buns

My younger sister, back before she nixed meat from her life, was a die hard consumer of pork buns.  Though she’s still a champion dim sum muncher, the title of pork bun king has been passed to my husband.  Apparently, he’s been a connoisseur his whole life, and in that my sister can’t partake, the torch has officially been passed to him.  And because he is truly the best ever, it was only a matter of time until I tried to make these bad boys for him.

I did my homework and found a lovely (GORGEOUS) recipe for homemade pork bun dough from master Chinese recipe writer, Andrea Nguyen.  And then I got a little sleepy and put off making it from scratch.  After roasting the pork myself and making the savory, sweet filling, I thought I owed myself a break.  What of some pre-made dinner roll dough?  I could still lacqueur it with a delicious glaze before chomping away?

Well, kiddos, although the buns are not a permanent substitute for the real thing (and homemade dough for that matter), they are still addictively good.  Plus, their smaller size makes for rapid-fire eating.  Consider adding these to your next cocktail party menu, or make a selection of dumplings and include these babies for a little home dim sum party of your own.  I’m sure my husband will find his way over to your house to indulge.

This recipe makes enough roast pork for 16 buns, with pork left over.  Consider using the rest of the pork sliced up for a delicious udon noodle soup or diced in fried rice.  Or eat plain with some sesame cucumbers.

Recipe for

Easy Baked Pork Buns

Ingredients
1 lb. of boneless pork ribs
1 packet of chinese barbecue seasoning mix
1 tbs. of sesame oil

1/8 tsp. of white pepper
1 tbs. of brown sugar
1 tbs. of dark soy
1 tbs. oyster sauce
1 tsp. sherry
1 tbs. sesame oil
1 tbs. of vegetable oil
4 scallions, white part only
1 tbs. water
1 tbs. cornstarch
salt to taste

2 tubes of Pillsbury french bread dough
2 eggs

2 tbs. of water
2 tbs. of honey

Begin by making the roast pork.  Mix the barbecue mix with the water and sesame oil.  Toss the pork in the marinade and let rest overnight.

Preheat the oven to 450°.  Line a baking sheet with a wire rack and place pork on top.  Roast the pork until barely cooked through, about 15 minutes.  Let cool.

Chop pork finely with a knife or in the food processor.  Heat a skillet over medium heat and add the sesame and vegetable oil.  Add the pork, white pepper, brown sugar, soy, oyster sauce, sherry and scallions and cook until fragrant, about 2 minutes.  Mix the water and cornstarch together until smooth and pour over the pork.  Stir until thickened and then taste for salt.  Let cool.

Cut the roll of dough into 8 pieces.  Flour a board and rolling pin, and roll each piece of dough into a 3in wide circle.  Add a heaping tablespoon of the pork filling to the middle of the dough.  Pinch the dough together in the center.  Place the bun, pinched side down, on a cookie sheet lined with parchment paper.  Repeat with the other buns.

Brush the buns with the beaten eggs and bake in the oven on 350° for 15 minutes.  Remove from the oven and while hot, brush with a mixture of honey and water.  Serve warm.

Ange’s Lazy Chicken Cordon Bleu

I have lovely memories of my mom’s baked chicken parmesan – we’d come home from elementary school and she’s take seemingly no time in breading chicken cutlets, seasoning them with paprika and spices, and then letting them crisp up in a hot oven.  They were always so juicy and deliciously perfect, I never ever questioned why we didn’t have Shake ‘n Bake in our pantry.  Mom knew what she was doing (and still does!)

After I got married, my aunt gave me a convection oven as a wedding present and I had to see if the crisping action was all it cracked up to be.  I made a riff off of my mom’s baked chicken with dijon and cream replacing the usual parmesan cheese.  Then, to make things more complicated, I tricked it out deconstructed cordon bleu style with a slice each of prosciutto and provolone. 

When the timer went off and the chicken emerged from the oven, the clouds parted in the heavens and the angels began to sing.  It was ever so perfect, with prosciutto like bacon and “everything’s-better-with” melted cheese.  J’adore!

I kind of like that Chicken Cordon Bleu has nothing to do with the culinary institute and is rather a cousin of retro throwbacks such as Chicken Kiev and other roulade-style meat dishes.  It makes me feel like I need to tease my hair, put on an A-line skirt and play a little Jack Jones “Wives and Lovers” to get in an old skool mood.  Ok, not really.  But it does make me miss my momma, thinking about all the foods that are meant for family dining.  This one is certainly high up on the list.

Recipe for

Easy Chicken Cordon Bleu

4 boneless, skinless chicken breasts
2 eggs, beaten
1/4 c. of cream
1/4 c. of water
1 tbs. of dijon mustard
1 c. of flour
3 tsp. of salt
1 1/2 tsp. of black pepper
1/2 tsp. of white pepper
1/2 tsp. of garlic powder
1/4 tsp. of paprika
4 slices of prosciutto
4 slices of provolone (or fontina)

Set up a breading station with two shallow dishes – one with the eggs, cream, water and dijon and the other with the flour, salt, black pepper, white pepper, garlic powder and paprika.  Dredge chicken breasts in flour, into the egg and then again in the flour.  Place on a parchment lined cookie sheet and top with a slice of cheese and a few slices of prosciutto.  Bake for 35-40 minutes on 350° or until the chicken is cooked through and the prosciutto is crispy and deep rose.  Serve.

Spaghetti all’Amatriciana

I have such great memories of amatriciana sauce in Italy – friends and I used to frequent a mom and pop pizzeria in the town we lived in as one of our favorite haunts.  The husband waitered, the wife cooked and the son bused the tables out of a front shop with an adjoining apartment behind the kitchen, making you feel a cherished guest at a friend’s house rather than a customer.  We typically went for piping hot pizzettas with pliant blistered crusts, tart tomatoes and creamy buffalo mozzarella.  One evening, I came home from class feeling exhausted and weighted down by a horrible headache.  My friends were running over to the restaurant and asked if I’d like something.  I asked them to bring me back some Pasta all’Amatriciana – a mouthful to pronounce but ever so delicious.  When they brought me my food, they brought me real silverware to eat with.  The mom was sure that we’d be back to return them, making us feel all the more like family.

Their classic version featured delicious guanciale, basically the jowl of the pig cured into bacon, but I like to use thick cut bacon for everyday amatriciana.  You can also use pancetta, with the rendered fat from the bacon allowing the onions to mellow into sweetness.  The whole thing is bound together by a tomato sauce of rich San Marzano tomatoes and white wine.  It’s a glorious sauce, and takes about as long to prepare as it does to boil a pot of pasta.  Good stuff considering that sometimes you don’t want to wait until the weekend (or a trip to Italy) to indulge in a meal fit for a king.

Recipe for

Spaghetti all’Amatriciana

Ingredients
5 slices of thick bacon, sliced into slivers
1/2 an onion, finely chopped
1/2 c. of wine
3 cloves of garlic
pinch of black pepper
pinch of crushed red pepper
4 c. of fresh tomato sauce
1/4 c. of grated locatelli
salt to taste
1 lb. of spaghetti
4 tbs. of freshly chopped parsley

Bring a pot of heavily salted water to a boil.  While the water heats up, warm the olive oil in a large skillet over medium heat.  Add the bacon and cook until crisp.  Add the onions to the pan and cook until very soft and golden.  Add the wine, scraping up any browned bits on the bottom of the pan.  Cook until the wine reduces by half.  Add the garlic and cook until fragrant.  Season with the black pepper and crushed red pepper.  Pour in the tomato sauce and bring to a simmer.  Stir in the grated cheese and taste for salt.

Cook the pasta according to the package directions.  Drain and add the sauce.  Top with the chopped parsley and additional grated cheese and crushed red pepper.

Thrifty Shrimp Wontons

In that I am an avid dumpling maker (so that I can afford to be a voracious dumpling eater), I tend to go through quite a bit of filling for the little buggers.  Much like the hot dog/hot dog bun conundrum (12 hot dogs vs. 8 buns), I often find myself with more filling than I have wrappers for.  What to do?!?

Given that the filling does not tend to keep very well (overnight at best, and never defrosted from frozen), I have found a quick and easy solution with wontons.  The wrappers are easy to come by in the produce section of the market (usually with the tofu) and can be transformed into the loveliest of soups.  In Chinese, wonton means “swallowing a cloud” – easily the perfect descriptor for a soup that is both complex and delicate at the same time.

So what’s the game plan, you may ask?  Very simple.  Bolster your leftover filling with some fresh shrimp, sesame oil and cornstarch.  Fill the wonton wrappers and twist into little satchels until you are out of filling.  Freeze the wrappers (as these guys do keep well) and make a pot of wonton soup.  If you have leftover wontons beyond the soup, either pan fry and serve with soy dipping sauce or deep fry and serve with duck sauce.  Last but not least, relish in your delicious frugality and trenchant wit.  Probably the most important step of all.

Recipe for

Thrifty Shrimp Wontons

Ingredients
1 lb. of shrimp, peeled and chopped
about 1 c. of leftover dumpling filling
1 tbs. of corn starch
2 tbs. of sesame oil
1 package of wonton skins
1 quart of chicken stock
1 tbs. of soy sauce
2 scallions, thinly sliced
1 inch of ginger, peeled

In a standing mixer or with a spoon, mix the leftover dumpling filling with the shrimp, corn starch and sesame oil.  Fill the wonton wrappers with a teaspoon each of filling.  Wet the edges with a bit of water and twist the corners together to form a little “money bag”.  Dip the bottom of the money bag into a small amount of flour and place on a cookie sheet lined with wax paper.  Repeat until you have used up all of your filling.  Set aside

Pour the chicken stock, soy and ginger into a pot and bring to a boil.  Add as many wontons as you’d like to eat (no more than 10 per quart of stock) and cook for 4-5 minutes.  Ladle soup into bowls and top with a handful of scallions.  Dig in.

Variations on the Soup

As a means of extending the majesty, feel free to use any of these add-ins:

  • handful of baby spinach
  • handful of bean sprouts
  • thinly sliced Chinese BBQ pork
  • crispy fried onions or shallots
  • thinly sliced chicken breast
  • lo mein, mai fun or udon noodles
  • peeled shrimp

Gorgeous Greek Feast

Please don’t attempt this feast with a small group – you’ll be full to the point of explosion, outdone by the amount of leftovers, and without room for even the mere thought of dessert. That all being said, break out that naughty and nice list of yours, and start calling the sweeties, because this is a menu that serves as a celebration in and of itself. I love this lineup of hearty greek dishes in that they are easy to prepare and keep well if you want to make everything ahead of time. In addition, the menu is weighted towards the vegetarian options (only the pastitsio and dolmades have meat, and both can be made without), thereby pleasing crowds of all appetites and dietary restrictions.

Mixed Greens with Gorgeous Greek Dressing

For the gorgeous greek dressing, you’ll want to whip up a simple greek salad to go with it. Start with a bed of romaine, iceburg and red leaf lettuce. Top with halved cherry tomatoes, thinly sliced red onion, rounds of cool cucumber and purple kalamata olives. Crumble some salty feta on top and serve with the dressing.

Baklava Sundaes

As for dessert, if you are short on time (or not interested in baking), pick up a baklava (or baklava bites) from your local grocery or greek market. Crush a few pieces of baklava with a fork and top with a scoop of haagen daas vanilla ice cream (or other rich vanilla brand). Top with a little honey and a pinch of ground cloves.

Whatever you decide to do, and whomever you choose to invite, make sure ouzo is invited to the party as well, and that you have a stack of old plates ready to throw in celebration of the perfect feast. OPA!


Simple Summer Barbecue

I actively eschew the cold – if anyone was born to relish in the blissful summer, it was me.  Sunkissed skin and bare toes.  A swing or two in the hammock or a walk along the sandy shore.  And dad firing up the grill next to the side porch, with the lot of us sitting on the steps (dogs included), sipping a cold beer waiting for the meat to finish up.  I live for those days.

This menu is not only a celebration of those lazy summer evenings when we’d tuck into thick steaks seared on the grill, but also an ode to the perfect produce of the summer.  Farmer’s market tomatoes, string beans, potatoes and greens all have a home in bright and glorious side dishes.  Rosemary works as both a flavoring and a utensil. And the skill required to prepare this meal is minimal – feed a few or a dozen with little to no effort other than chopping a veg or two and flipping on the grill. And that’s not even including any delegation – get some mark to shuck your corn or snap your string beans and you’re living easy. Which is entirely what summer is all about.


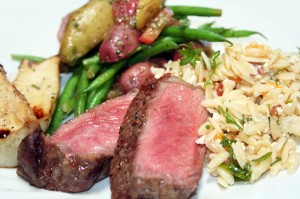
Tuscan Grilled Ribeye

Filet be damned, I want a ribeye.  I want a thick cut, well-marbled ribeye with a juicy center and a lovely charred edge.  I want nary the spice or marinade other than a smattering of coarse salt or crushed pepper, with olive oil to marry it all together and a brush of rosemary as a whisper of flavor with each bite.  In the words of Veruca Salt, “Don’t care how – I want it NOW!”

Kidding, I’m not a brat and I can totally whip this up for myself.  It’s the best kind of recipe in that it’s barely a recipe.  Making a steak at home is surprisingly forgiving and has more to do with the quality of the meat and the amount of time you give it to cook.  Letting the steak come to room temperature before cooking, letting it sit on the grill undisturbed before flipping, and letting it rest so that the juices redistribute are all necessary steps to the perfect bite of steak.  In addition, if you can splurge for a prime dry-aged steak, definitely do it.  It’s a total treat, and though pricey, a lot less expensive than a steak dinner out on the town.

When you are purchasing a ribeye, look for rosy, well-marbled meat where the eye (the round of fat in the middle of the steak) is intact.  This bit of fat keeps the meat moist during cooking and adds perfect flavor – shying away from the fat means you are denying yourself the succulence and juiciness that you so rightly deserve from your steak.  Other than that, there really isn’t that much to it – season, grill, rest and dig in.

Recipe for

Tuscan Grilled Ribeye

Ingredients
2 ribeye steaks, 1 inch thick
kosher salt and pepper
sprig of rosemary
olive oil

Heat a grill or a grill pan on high.  Liberally salt and pepper steaks on both sides.  Drizzle with olive oil and using the sprig of rosemary, rub the spices and oil into the meat.  Flip and repeat on the other side, rubbing the flavor of the rosemary into the meat.  Let steaks sit at room temperature while the grill heats up.

Grill the steaks, undisturbed, for 10 minutes on each side for medium rare.  Let rest for at least five minutes before slicing.  Serve.

Orecchiette with Arugula Pesto

I totally believe that arugula is an aphrodisiac as thought in the Roman times, solely based on the fact that I am head over heels in love with it.  The nutty, peppery flavor of the greens, and its ability to work as a crisp salad green or sauteed and cooked to luscious perfection – versatility makes me crush hard core, and baby, arugula has my heart.  When used as a replacement for basil in a quick pesto, you get to see arugula truly shine – just barely cooked by the hot pasta, it goes from bitter to complex and rounded in flavor.  It’s miraculous and ever so sexy.

I use the pesto to dress dainty orecchiette, petal-shaped pasta from the south of Italy.  Named “little ears” in Italian, each bit of pasta is made from a mini fingerprint into a press, forming a crinkly texture that soaks up the pesto.  It’s all about the love with a uniting of Northern Italian sauce (pesto is from Genoa) with Southern Italian pasta (orecchiette are from Puglia).  And I could just be mentioning love because the arugula is wooing me to do so.  Woo away, arugula.  Woo away.

Recipe for

Orecchiette with Arugula Pesto

Ingredients
1 lb. of orecchiette
4 loose cups of arugula
3 cloves of garlic
1/2 c. of olive oil
1/2 c. of grated locatelli (or parmigiano reggiano)
1/4 c. of toasted pine nuts
2 tsp. of freshly cracked pepper
1 tsp. of salt

Bring a large pot of salted water to a boil.  Cook pasta according to package directions.

While the pasta cooks, make the pesto.  Throw cloves of garlic into the CuisineArt and pulse until finely chopped. Add toasted pine nuts and pulse again. Next, add the arugula (stems and all) and chop until the mixture starts to form a paste. Coax the entire mixture into a smooth paste by slowly streaming in olive oil – stop once everything is blended and evenly chopped. Add the grated cheese, salt and pepper and pulse to mix. Taste for salt.

Once pasta is finished, scoop a scant 1/4 cup of pasta water out of the pot.  Drain the pasta and immediately toss with the pesto.  Dribble in a bit of the pasta water, if necessary, to form a sauce.  Top with extra grated cheese and serve.

Grilled Corn with Herb Butter

Get Yer Char On

I have a wacky allergy to corn silk, but it doesn’t keep me from tucking into corn on the cob in the summertime. We always had ears of sweet, white corn boiled to perfection and perked up by sugar, salt and creamy butter. But a while back, when I was introduced to the joys of grilling corn instead of boiling it, I was an instant convert.  No need to steam up the house and the added loveliness of smoky char with the sweet corn goodness.  It was brilliant through and through.

On days that I’m not thinking ahead to grilling corn for the evening, I have my trick of getting around the usual 30 minutes of soaking in salt water and another 25 minutes grilling the corn.  I’ve got into the habit of microwaving the corn in the husk to pre-steam it before grilling, cutting the entire cooking time down to a meager 20 minutes tops.  You top the whole thing off with a delicious compound butter made of fresh basil, chives and parsley.  It’s one of those tricks for the arsenal when a bland barbecue chicken breast or ho hum hot dog is in your grilling future.  This life is too short to be bored with boiled corn.

Grilled Corn with Herb Butter

6 ears of corn
1 stick of butter
3/4 tsp. of salt
1/8 tsp. of paprika
1/4 tsp. of black pepper
1/3 c. of basil leaves
1/8 c. of chopped chives
1/4 c. of parsley leaves

Begin by making your herb butter.  Put the salt, paprika, black pepper, basil and parsley in the food processor.  Chop finely and then add the butter and chives.  Blend to combine and then scrape out of the food processor with a spatula.  Chill.

Carefully pull back the husks, leaving the ends still attached.  Remove the silk and discard.  Put the husks back over the corn.  Place a wet paper towel in the microwave and top with two ears of corn.  Microwave for 2 minutes, turn over, and cook for another two minutes.  Set aside.  Repeat with the other ears of corn.

Heat your grill on high and place the ears of corn on top.  Grill for about 6-7 minutes per side, or until the husks char and the corn gets some gorgeous grill marks.  Let cool for a moment and then pull back the husks.  Slather the ears of corn with the herb butter and serve.

Grilled Trumpet Mushrooms

Everybody knows that I’m a fan of mushrooms.  And yes, I just said that in my best Phaedra Parks voice.  I’m amazed by folks who aren’t down with fungus, but that emotion is quickly replaced with, “If you’re not gonna eat those, I’ll take care of ’em for you.”  In addition to the plebian (but ever so delicious) market staples of white buttons, portobellos and cremini mushrooms, I’m a huge fan of those mushrooms that are literally found off the beaten path.  Maitakes, enoki and chanterelles are all beloved, and pricey morels are a necessary splurge during their short spring season.  Even the funky ones that are more chewy than spongy, like the wood ear mushrooms or black trumpets.

I particularly love the versatile ones that hold up to all sorts of cooking and cuisines, and oyster mushrooms are no exception.  Royal oysters (sometimes called King Trumpets) are fabulous in that after a little cooking, they still retain all of their flavor and their texture.  So much so that you can actually marinate them and grill them, treating trumpets like a protein rather than a vegetable.  If you see these guys at the market sometime, give them a whirl – they’re a simple side and will sway even the most skeptical mushroom eater.  Actually, sway or no, who cares.  I want to eat these and not share with anyone.  I’m not kidding.

Grilled Trumpet Mushrooms

8 trumpet (royal oyster) mushrooms, halved and bottoms trimmed
1/4 c. of white balsamic vinegar
6 tbs. of olive oil
1 tsp. of kosher salt
1 tbs. of chopped rosemary
1/4 tsp. of coarse ground black pepper

Mix balsamic vinegar, olive oil, salt, pepper and rosemary together in a small bowl.  Pour over mushrooms and toss to mix.  Marinate for 20 minutes.

Heat a grill or a grill pan and oil lightly.  Place mushrooms on the grill and cook for about 3 minutes on each side until the mushrooms are slightly browned.  Serve.

Foodie for Life—Delicious to Death